Step Sequencer
On this page
The step sequencer lets you audition all four voices together in a rhythmic pattern. Rather than clicking individual play buttons, you can program a looping 16-step sequence that plays your kit’s samples in context – hear how a kick, snare, hi-hat, and clap work together before syncing to the Rample.
Toggle the sequencer with the Show/Hide Sequencer button at the bottom of the kit view, or press S.

Grid Basics
The sequencer is a 4-row, 16-step grid representing one bar of 16th notes:
- Each row corresponds to one voice (Voice 1 through 4, top to bottom)
- Click any step to toggle it on or off
- Active steps are highlighted in the voice’s color with an LED glow effect
- Vertical dividers mark every 4 steps (beat boundaries) for visual orientation
Transport Controls
On the left side of the sequencer:
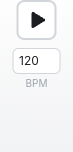
- Play/Stop button – Start or stop playback. The button glows orange while playing
- BPM control – Set the tempo (30–180 BPM). Click the field to type a value, or use the up/down arrow keys to nudge by 1 BPM
- Cycle counter – Appears during playback, showing which cycle (loop repetition) the sequencer is on. This is especially useful with trigger conditions (see below)
A moving playhead highlights the current step during playback with a white ring.
Trigger Conditions (Step Logic)
Trigger conditions let you control which cycles a step fires on, effectively creating patterns much longer than 16 steps. Right-click any step to open the condition popover.
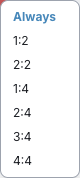
Each condition uses an A:B format, meaning “fire on the Ath repetition of every B cycles”:
| Condition | Meaning | Effective pattern length |
|---|---|---|
| Always (default) | Fires every cycle | 16 steps |
| 1:2 | Fires on odd cycles (1st of every 2) | 32 steps |
| 2:2 | Fires on even cycles (2nd of every 2) | 32 steps |
| 1:4 | Fires on the 1st of every 4 cycles | 64 steps |
| 2:4 | Fires on the 2nd of every 4 cycles | 64 steps |
| 3:4 | Fires on the 3rd of every 4 cycles | 64 steps |
| 4:4 | Fires on the 4th of every 4 cycles | 64 steps |
For example, to create a snare that only hits every other bar: activate a step on the snare row and set its condition to 1:2. To build a fill that only plays on the 4th repetition, use 4:4. By combining different conditions across steps, you can create evolving patterns up to 64 steps long within the 16-step grid.
Active steps with a trigger condition display the condition label (e.g., “4:4”) on the step button. Inactive steps with a condition show a small dot as a reminder.
Sample Selection Mode
When a voice has multiple samples loaded, the sample mode button (to the right of the step grid) controls which sample plays on each trigger. Click the button to cycle through three modes:
- 1st (first) – Always plays the first sample in the voice. This is the default
- Rnd (random) – Randomly picks a sample from the voice on each trigger, adding natural variation
- R-R (round-robin) – Cycles through samples in order (1st trigger plays sample 1, 2nd plays sample 2, and so on), then wraps back to the beginning
Round-robin and random modes are powerful for creating realistic drum patterns – load multiple kick or hi-hat variations into a single voice and let the sequencer cycle through them automatically.
Voice Volume and Mute
Each voice has a volume slider on the right side of its row. Drag the slider to adjust that voice’s playback volume (0–100%). Volume changes are saved to the kit.
Note: Voice volume only affects preview playback in Romper – it is not written to the SD card during sync. If you need volume adjustments that carry over to the Rample hardware, use the per-sample gain control in the Kit Editor, which is baked into each WAV file on sync.
The speaker icon next to the volume slider toggles mute for that voice. When muted:
- The voice is silenced during sequencer playback
- The row fades to reduced opacity as a visual indicator
- Mute state is session-only and resets when you reopen the kit
Muting is useful for isolating voices – mute everything except the hi-hat to focus on its pattern, or mute a voice temporarily while adjusting the others.
Stereo Linked Channels
When two voices are configured for stereo playback (e.g., Voices 1+2 or Voices 3+4), the sequencer automatically combines them into a single stereo row. The primary voice’s label changes to show the pairing (e.g., “1+2”), and the secondary voice’s row is hidden. Steps, trigger conditions, volume, mute, and sample mode all control both channels together through the primary voice’s row.
Persistence
Sequencer patterns, trigger conditions, BPM, and sample modes are all saved per-kit in the database. Your patterns persist across sessions. Voice mutes are session-only.
Example: Building a Pattern with the C0 Factory Kit
This example uses the factory default C0 kit to demonstrate steps, trigger conditions, sample selection modes, and volume controls working together. Try recreating this pattern and pressing play to hear how it sounds.
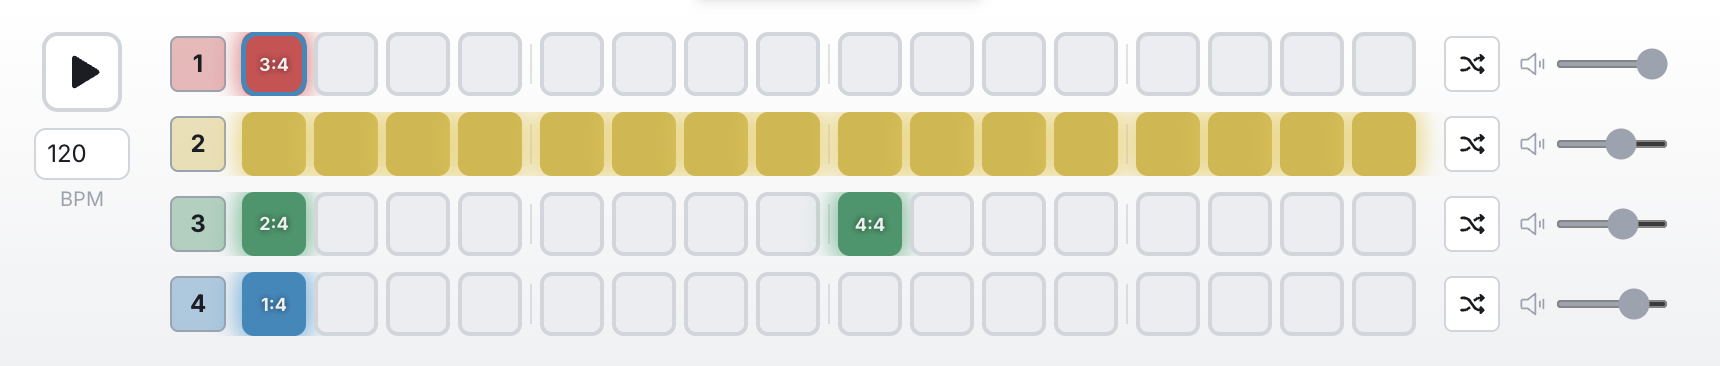
Here’s what’s programmed in each voice:
- Voice 1 (Kick) – A single hit on step 1 with a 3:4 trigger condition, so it only fires on the 3rd of every 4 cycles. Sample mode is set to Rnd (random) to vary which kick sample plays each time.
- Voice 2 (Hi-Hat) – A busy pattern with most steps active (steps 2–7 and 9–16), creating a driving hi-hat rhythm. No trigger conditions, so it plays every cycle. Sample mode is Rnd for subtle variation between hits.
- Voice 3 (Snare) – Two hits using different trigger conditions: step 2 with 2:4 (fires on the 2nd cycle) and step 9 with 4:4 (fires only on the 4th cycle). This creates a snare pattern that evolves over 4 bars. Sample mode is Rnd.
- Voice 4 (Clap) – A single hit on step 2 with a 1:4 condition, so it only sounds on the 1st of every 4 cycles. Sample mode is Rnd.
What to listen for: Because each voice uses different trigger conditions across a 4-cycle span, the pattern evolves over 4 bars before repeating. The kick appears only on bar 3, the snare shifts between bars 2 and 4, and the clap anchors bar 1 – all while the hi-hat drives steadily underneath. Watch the cycle counter next to the BPM to follow which bar you’re on.
To recreate this pattern:
- Open the C0 kit and press
Sto show the sequencer - Click steps to activate them in each row (refer to the screenshot above)
- Right-click each step that needs a condition and select the appropriate A:B value
- Click the sample mode button on each row until it shows the shuffle icon (Rnd)
- Press Play and listen to the pattern evolve over 4 cycles
Keyboard Shortcuts
| Action | Shortcut |
|---|---|
| Show/hide sequencer | S |
| Toggle step | Space or Enter |
| Navigate steps | Arrow keys |